

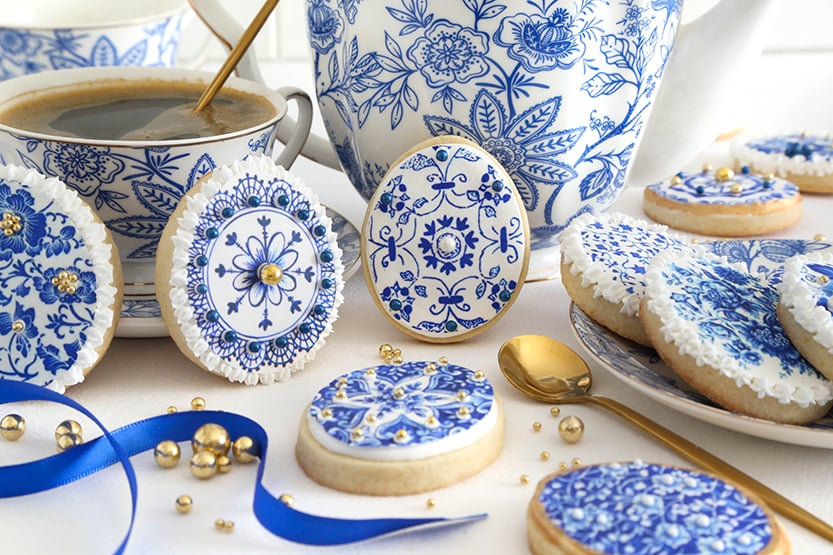
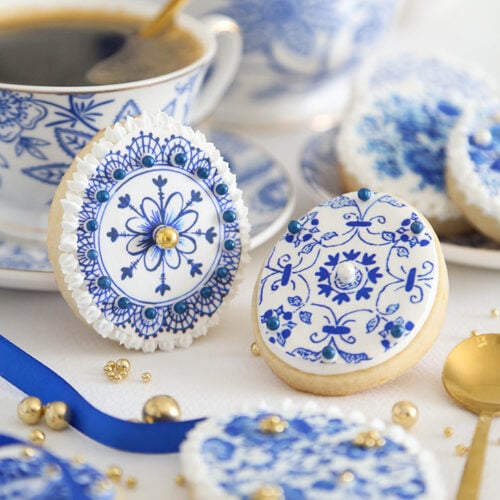
These Delft Blue Sugar Cookies are the perfect elegant touch for your Easter table. Decorated with edible icing sheets printed in classic blue and white patterns, these cookies have the timeless appeal of Delftware ceramics – and they’re surprisingly simple to create!

Instead of decorating eggs for Easter this year, I vote we all decorate egg sugar cookies instead! These Delft blue sugar cookies were inspired by my love of Delft ceramics, which are made to look like porcelain with their delicate blue and white patterns. Originating from the Netherlands, Delftware is renowned for its intricate hand-painted motifs that depict pastoral scenes, floral patterns, and other ornate designs. I’ve always admired the aesthetic, which inspired me to recreate the look in a cookie form. Despite their appearance, these cookies are surprisingly simple for most home bakers to make, using printed icing sheets. In fact, anyone who can whip up a batch of royal icing can manage these cookies!
Make the Sugar Cookie Dough
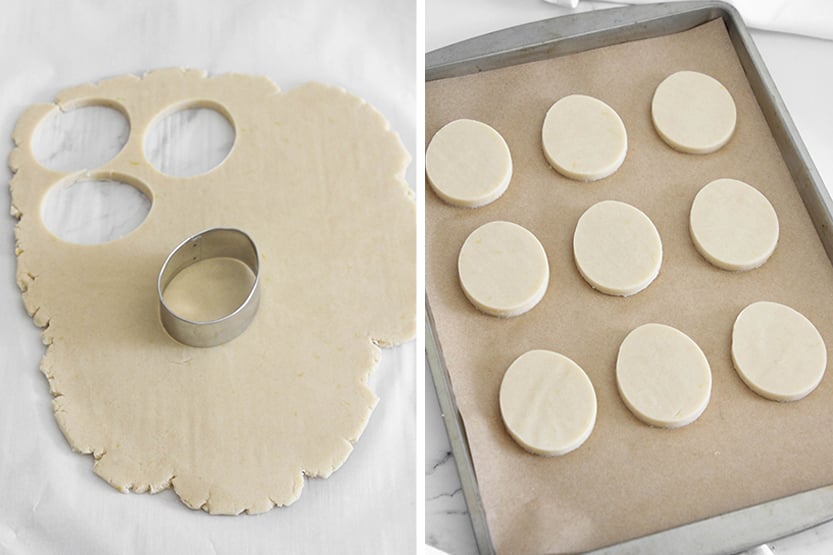
Start by preparing my simple sugar cookie dough, which is a staple for all my cookie decorating. Since this dough contains no chemical leavening agents, the cookies hold their shape beautifully without puffing up during baking. Once mixed, roll out the dough between sheets of parchment paper and chill for at least 30 minutes. After chilling, cut out egg shapes using a 2.5-inch egg cookie cutter and place them on a parchment-lined baking sheet. Chill once more before baking – this helps the cookies maintain their crisp edges.
Bake and Frost
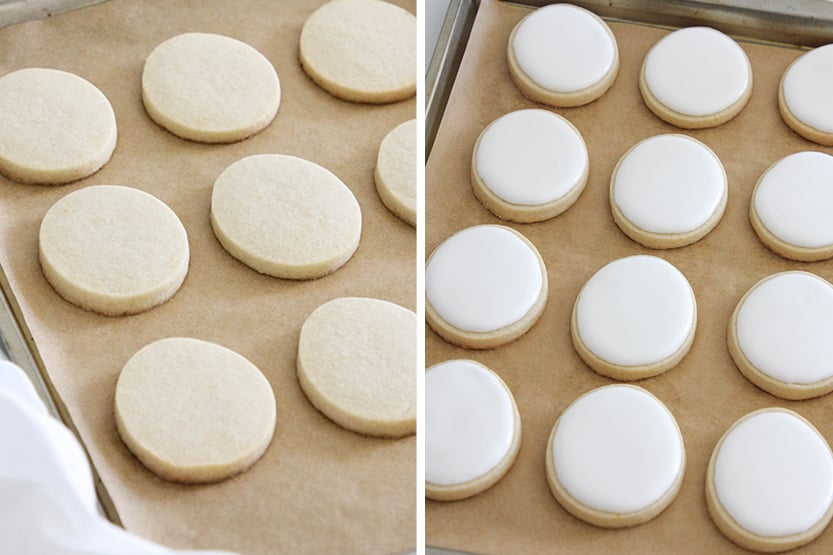
Bake the cookies at 350°F for about 12 minutes, until the edges are lightly golden. Once your cookies have cooled, it’s time to add a smooth base layer of royal icing. Prepare your royal icing to a flood consistency, aiming for a thick, pourable texture that smooths out on its own. Outline the cookies with the flood royal icing using a small round tip, wait a few seconds, then flood the interiors. Allow the iced cookies to dry completely, about 4 hours or overnight, before moving on to the decoration.
Prepare the Icing Sheet Cut-Outs
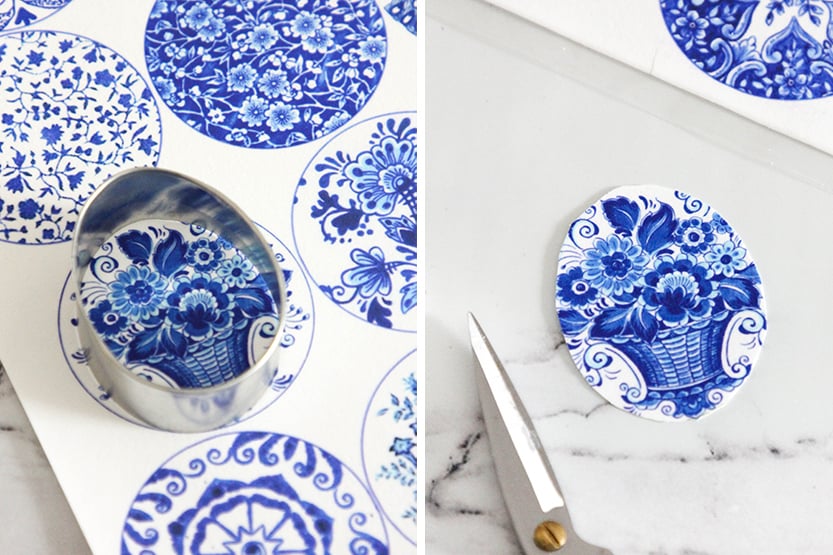
To create the stunning Delft Blue look, use printed icing sheets with classic blue and white designs. You can find the ones I used here. They are meant to be used as cupcake toppers, but they work well for cookies, too! Here’s another nice blue and white pattern that could be trimmed to fit these cookies, with Portuguese tile motif. You may remember these bunny cookies that I made with printed wafer paper. The technique is pretty much the same for making these cookies, except icing sheets are thicker, more opaque, and taste sweeter than wafer paper.
Center your egg cookie cutter over each image, trace around it with a food color marker, and carefully cut out the shapes using kitchen scissors. If you’re still waiting for the icing on your cookies to set, then pop the cut-outs in a zip top bag so they don’t dry out. Because they will become brittle, otherwise.
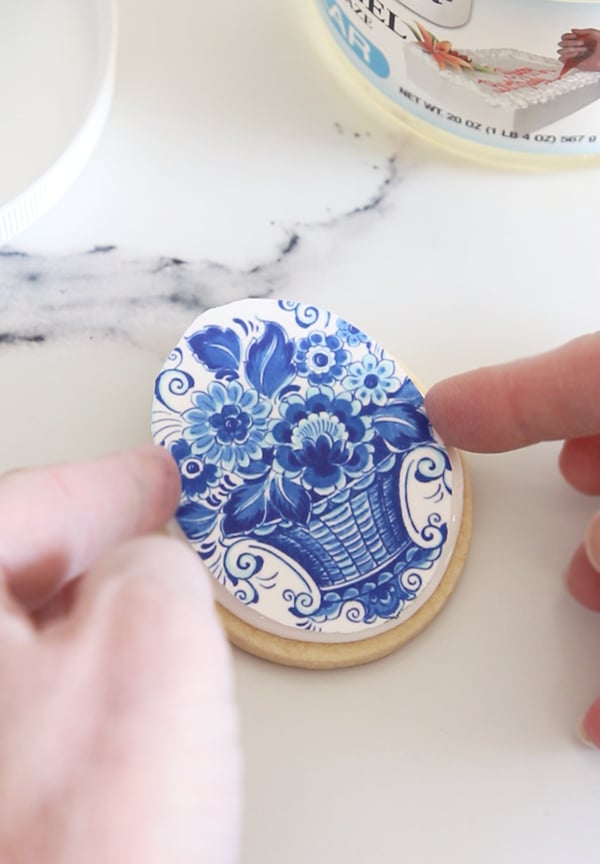
Apply the Icing Image to the Cookie
Brush a thin layer of piping gel or corn syrup over the dried royal icing. Then, gently center your icing sheet cut-out over the cookie and press it down lightly to adhere.

Dry the Cookies Upside-Down
For best results, turn the cookies upside down on a parchment-lined baking sheet, allowing the pressure to ensure the icing sheet adheres smoothly. Let them dry for a couple of hours. Drying the cookies upside down ensures a flawless finish, preventing any air bubbles or lifting.
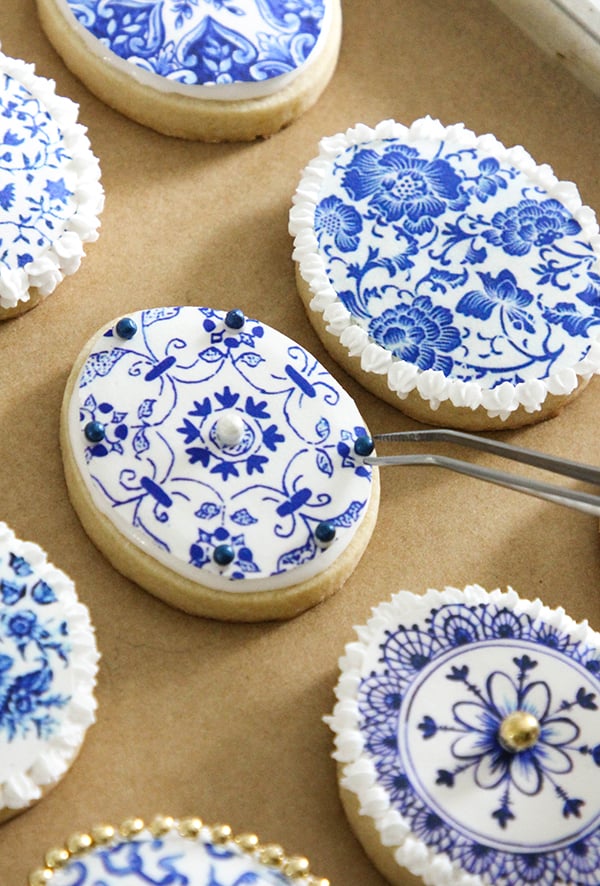
Embellish with Dragees
Once the cookies are dry, add elegant embellishments using gold dragees and sugar pearls. Using leftover royal icing as “glue,” pipe small dots where you’d like to add a decorative accent. With a pair of kitchen tweezers, carefully place the dragees for an almost Fabergé egg touch.

Add a Ruffle Border
Pipe a delicate ruffle border around your cookies using stiff peak royal icing. Fit a piping bag with a small star tip. Hold the bag at a 45-degree angle and pipe small, consecutive stars around the edges of the cookies. The result is a beautiful frilled border that adds a fancy confectionery touch to your Delft blue sugar cookies.
I also left some of the edges plain, or painted them with gold dust thinned in vodka. Because the vodka evaporates, it leaves just the gold shine behind.

Blue and white ‘porcelain’ cookies.

Package for Gift-Giving
These cookies make for thoughtful and elegant gifts. Place them in clear cellophane bags, tied with a blue silk ribbon. They’re perfect as Easter table favors. Add one to each place setting for edible table décor.

While I’ve designed these cookies in egg shapes for Easter, you can easily cut them into round shapes for any event. These Delft-inspired cookies are beautiful for weddings, garden parties, black-tie dinners, or even as opulent additions to a tea party. The gold dragee accents give them a Fabergé egg-like quality, making them perfect for occasions that call for a bit of luxury.
And if you’re like me, with a love for blue and white china, you don’t really need a special occasion to enjoy these cookies. Happy baking!
Related recipe: Toile Print Lemon Lavender Shortbread
Delft Blue Sugar Cookies
-
2.5-inch egg cookie cutter
-
small round decorator piping tip, #1 or #2
-
small closed star decorator piping tip
-
kitchen dedicated tweezers
-
kitchen dedicated art brush with soft bristles
Sugar cookie dough
- 1/2 lb. unsalted butter
- 1 cup granulated sugar
- Zest of 1 lemon
- 1 large egg
- 1 tsp. vanilla extract
- 3 cups all-purpose flour
- pinch of salt
Sugar cookies
-
In an electric mixer fitted with the paddle attachment, mix the butter and sugar together until just incorporated. Add the lemon zest. Mix again. Do not over-mix at this stage, or the cookies may spread while baking.
-
Add the egg and vanilla extract. Mix again on low speed, stopping to scrape down the sides of the bowl intermittently as needed.
-
In a medium bowl, whisk together the flour and salt. Add to the butter and egg mixture. Mix on low speed until a dough is formed and there are no longer any streaks of butter in the mixing bowl. The dough will often clump around the paddle attachment while being mixed. This is normal and a good sign that your dough is the right consistency. If your mixture does not come together and is crumbly, add ice cold water 1 tbsp. at a time until the dough clumps. Roll the dough flat between sheets of parchment paper and chill until ready for use, at least 30 minutes.
-
Preheat the oven to 350°F. Line two baking sheets with parchment paper.
-
Use a 2.5 -inch egg cutter to stamp shapes from the dough and transfer them to the prepared pans. Chill the shapes in the refrigerator for 15 minutes. Bake cookies for 12 minutes, or until the cookies are lightly brown on the edges. Transfer the cookies to a wire rack to cool completely.
Royal icing and decors
-
In the bowl of an electric mixer fitted with the whisk attachment, stir the confectioners’ sugar and meringue powder on low speed until combined.
-
Add the water and beat on medium-high speed until thickened to stiff peaks. Mix in the flavoring. Beat again until combined and fluffy. Transfer half of the stiff peak icing to a piping bag fitted with a small closed star decorator tip. Cover the tip with a damp paper towel and set aside. To the bowl of remaining icing, mix in drops of water until the icing thins to flood consistency (It should be thick and pourable like a milkshake. Run a spatula through the icing to check; the indention should disappear close to the count of 10.) Use the icing immediately or drape a damp tea towel over the mixing bowl or bowls to prevent the icing from drying out.
-
Transfer the icing to a disposable piping bag fitted with a small plain round tip, such as #1 or #2. Pipe a line of frosting around the outer edge of the cookies. Let stand for 1 minute. Flood the inside of the shape with more icing until completely covered and smooth. Let stand until dry, about 4 hours or overnight.
-
Use the same egg cookie cutter used for the dough as a template to cut out icing sheet images. Center the cutter on an image, and using a food color pen, trace around the egg with a food color marker and cut it out. I cut the shapes out with kitchen-dedicated scissors, or you can use an X-acto knife. Store the cut-outs in a zip-top bag so they don’t dry out.
-
After the royal icing has completely dried on the cookies, brush each with a light layer of piping gel, and then place the icing sheet cut-out on top. Turn the cookies upside down to dry completely, so the wafer paper lies perfectly flat. This will take a couple of hours to dry completely.
-
When cookies are dry, flip them upright. For a frilled decorative edges, use the reserved piping bag with the star tip to pipe a stiff peak royal icing ruffle around the edges of some of the cookies.
-
To decorate plain edges, mix gold luster dust with drops of vodka to create a medium-bodied gold paint. Paint it around the cookie edges to finish. Allow the cookies to dry completely, 1 hour.
-
Place dots of leftover flood royal icing on the images where appropriate (such as the center of a flower, or dotted patterns of the design). Use chef’s tweezers to apply gold dragees and sugar pearls. Allow them to dry until firm, 20 minutes.
-
Package in cellophane bags tied with blue silk ribbon, or if making egg shapes as I have, arrange them in an Easter basket for after dinner take-away favors. Or use as table decorations at each place setting.
Royal Icing with Egg Whites: If you don’t have meringue powder on hand, you can still make the royal icing with egg whites. See my Conversation Heart Cookies recipe for the ingredients, and double the amounts for this recipe.